Урок 78. Tab - вкладки. TabContentFactory, ручное создание содержимого вкладки
В этом уроке:
- вручную создаем содержимое вкладки
При работе с вкладками система предоставляет нам возможность самим создать View, которое будет использовано в качестве содержимого вкладки. Нам надо просто создать объект, реализующий интерфейс TabContentFactory, и накодить метод createTabContent. Этот метод на вход берет тэг, а выдать должен View.
View мы умеем создавать двумя способами: 1) непосредственно ручное создание объекта; 2) с помощью LayoutInflater.
Создадим проект:
Project name: P0781_TabContentFactory
Build Target: Android 2.3.3
Application name: TabContentFactory
Package name: ru.startandroid.develop.p0781tabcontentfactory
Create Activity: MainActivity
Пропишем текст в strings.xml:
<?xml version="1.0" encoding="utf-8"?>
<resources>
<string name="app_name">TabContentFactory</string>
<string name="text_tab">Это создано с помощью LayoutInflater </string>
</resources>
Экран main.xml:
<?xml version="1.0" encoding="utf-8"?>
<LinearLayout
 xmlns:android="http://schemas.android.com/apk/res/android"
 android:layout_width="fill_parent"
 android:layout_height="fill_parent"
 android:orientation="vertical">
<TabHost
 android:id="@android:id/tabhost"
 android:layout_width="match_parent"
 android:layout_height="match_parent">
<LinearLayout
 android:layout_width="match_parent"
 android:layout_height="match_parent"
 android:orientation="vertical">
<TabWidget
 android:id="@android:id/tabs"
 android:layout_width="match_parent"
 android:layout_height="wrap_content">
</TabWidget>
<FrameLayout
 android:id="@android:id/tabcontent"
 android:layout_width="match_parent"
 android:layout_height="match_parent">
</FrameLayout>
</LinearLayout>
</TabHost>
</LinearLayout>
FrameLayout не заполняем, т.к. сами будем View создавать.
Создадим layout-файл tab.xml:
<?xml version="1.0" encoding="utf-8"?>
<LinearLayout
 xmlns:android="http://schemas.android.com/apk/res/android"
 android:layout_width="match_parent"
 android:layout_height="match_parent"
 android:orientation="vertical">
<TextView
 android:layout_width="wrap_content"
 android:layout_height="wrap_content"
 android:text="@string/text_tab">
</TextView>
</LinearLayout>
Из него мы с помощью LayoutInflater будем получать View и устанавливать в качестве содержимого вкладки.
Кодим MainActivity.java:
package ru.startandroid.develop.p0781tabcontentfactory;

import android.app.TabActivity;
import android.os.Bundle;
import android.view.View;
import android.widget.TabHost;
import android.widget.TextView;

public class MainActivity extends TabActivity {

  final String TABS_TAG_1 = "Tag 1";
  final String TABS_TAG_2 = "Tag 2";


    /** Called when the activity is first created. */
    public void onCreate(Bundle savedInstanceState) {
        super.onCreate(savedInstanceState);
        setContentView(R.layout.main);

        TabHost tabHost = getTabHost();

        TabHost.TabSpec tabSpec;

        tabSpec = tabHost.newTabSpec(TABS_TAG_1);
        tabSpec.setContent(TabFactory);
        tabSpec.setIndicator("Вкладка 1");
        tabHost.addTab(tabSpec);

        tabSpec = tabHost.newTabSpec(TABS_TAG_2);
        tabSpec.setContent(TabFactory);
        tabSpec.setIndicator("Вкладка 2");
        tabHost.addTab(tabSpec);

    }

    TabHost.TabContentFactory TabFactory = new TabHost.TabContentFactory() {

    @Override
    public View createTabContent(String tag) {
      if (tag == TABS_TAG_1) {
        return getLayoutInflater().inflate(R.layout.tab, null);
      } else if (tag == TABS_TAG_2) {
        TextView tv = new TextView(MainActivity.this);
        tv.setText("Это создано вручную");
        return tv;
      }
      return null;
    }
  };
}
Создание вкладок идет как обычно, только методу setContent на вход передаем объект, реализующий TabHost.TabContentFactory. Когда системе необходимо будет построить содержимое вкладки, она воспользуется этим объектом - вызовет его метод createTabContent. На вход ему пойдет тэг вкладки, на выходе должно получиться View. И наша задача – реализовать это.
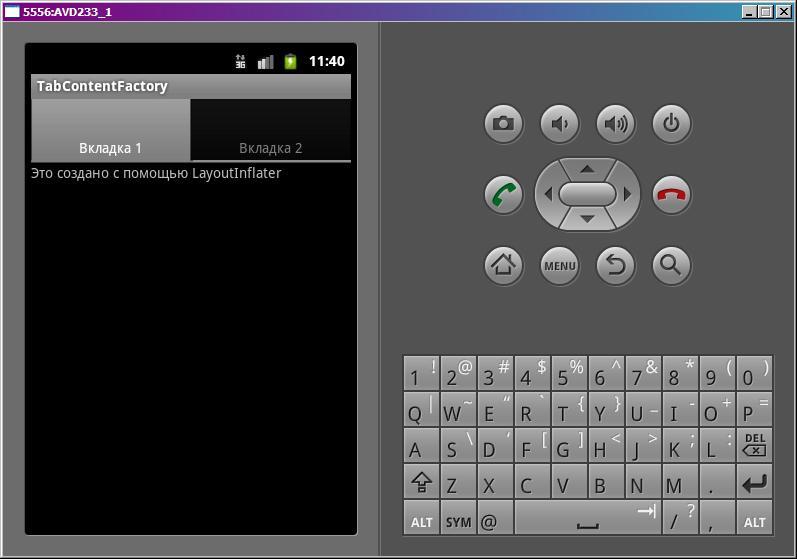
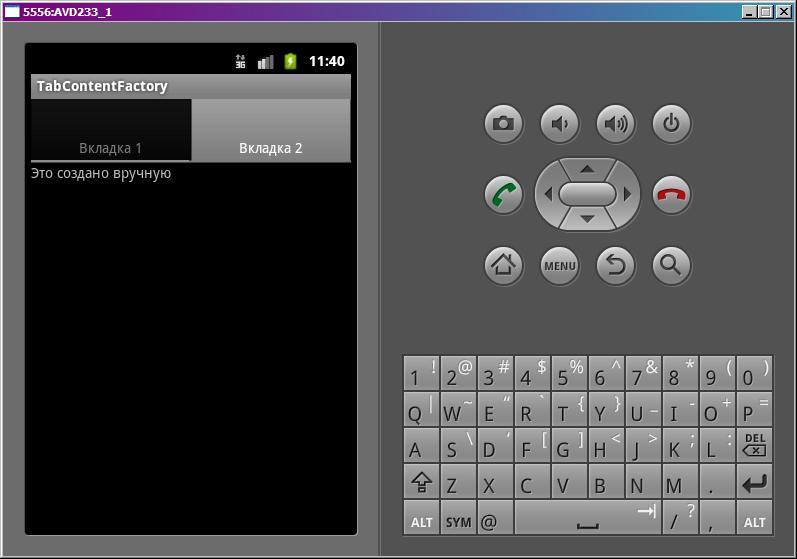
TabFactory – объект, реализующий интерфейс TabHost.TabContentFactory. В его методе createTabContent мы проверяем тэг. Если это тэг первой вкладки, то прогоняем tab.xml через LayoutInflater и возвращаем получившееся View. Если тэг второй вкладки, то вручную создаем TextView и возвращаем его.
Все сохраним и запустим приложение. Первая вкладка:

Вторая вкладка:

В итоге мы создали содержимое первой вкладки из layout-файла, а содержимое второй – сами, через создание объектов.
На следующем уроке:
- парсим XML с помощью XmlPullParser
